Monday, December 31, 2012

O Tannenbaum V

Quilt # 116.

O Tannenbaum V

This is my last entry for the UFO Challenge 2012 issued by Judy Laquidara at Patchwork Times.  Have a look at what everyone else has accomplished.

This was #9 which is actually the November challenge.  It did not get done in November but I have now completed all of my UFOs from this challenge except for December's and a bit of quilting to finish on my October's challenge.  All the posts for this project can be seen here.

It was a good year for UFO busting, thanks Judy!   Still lots in the pile but it is definitely getting smaller. I'm really trying to complete everything that I start now!
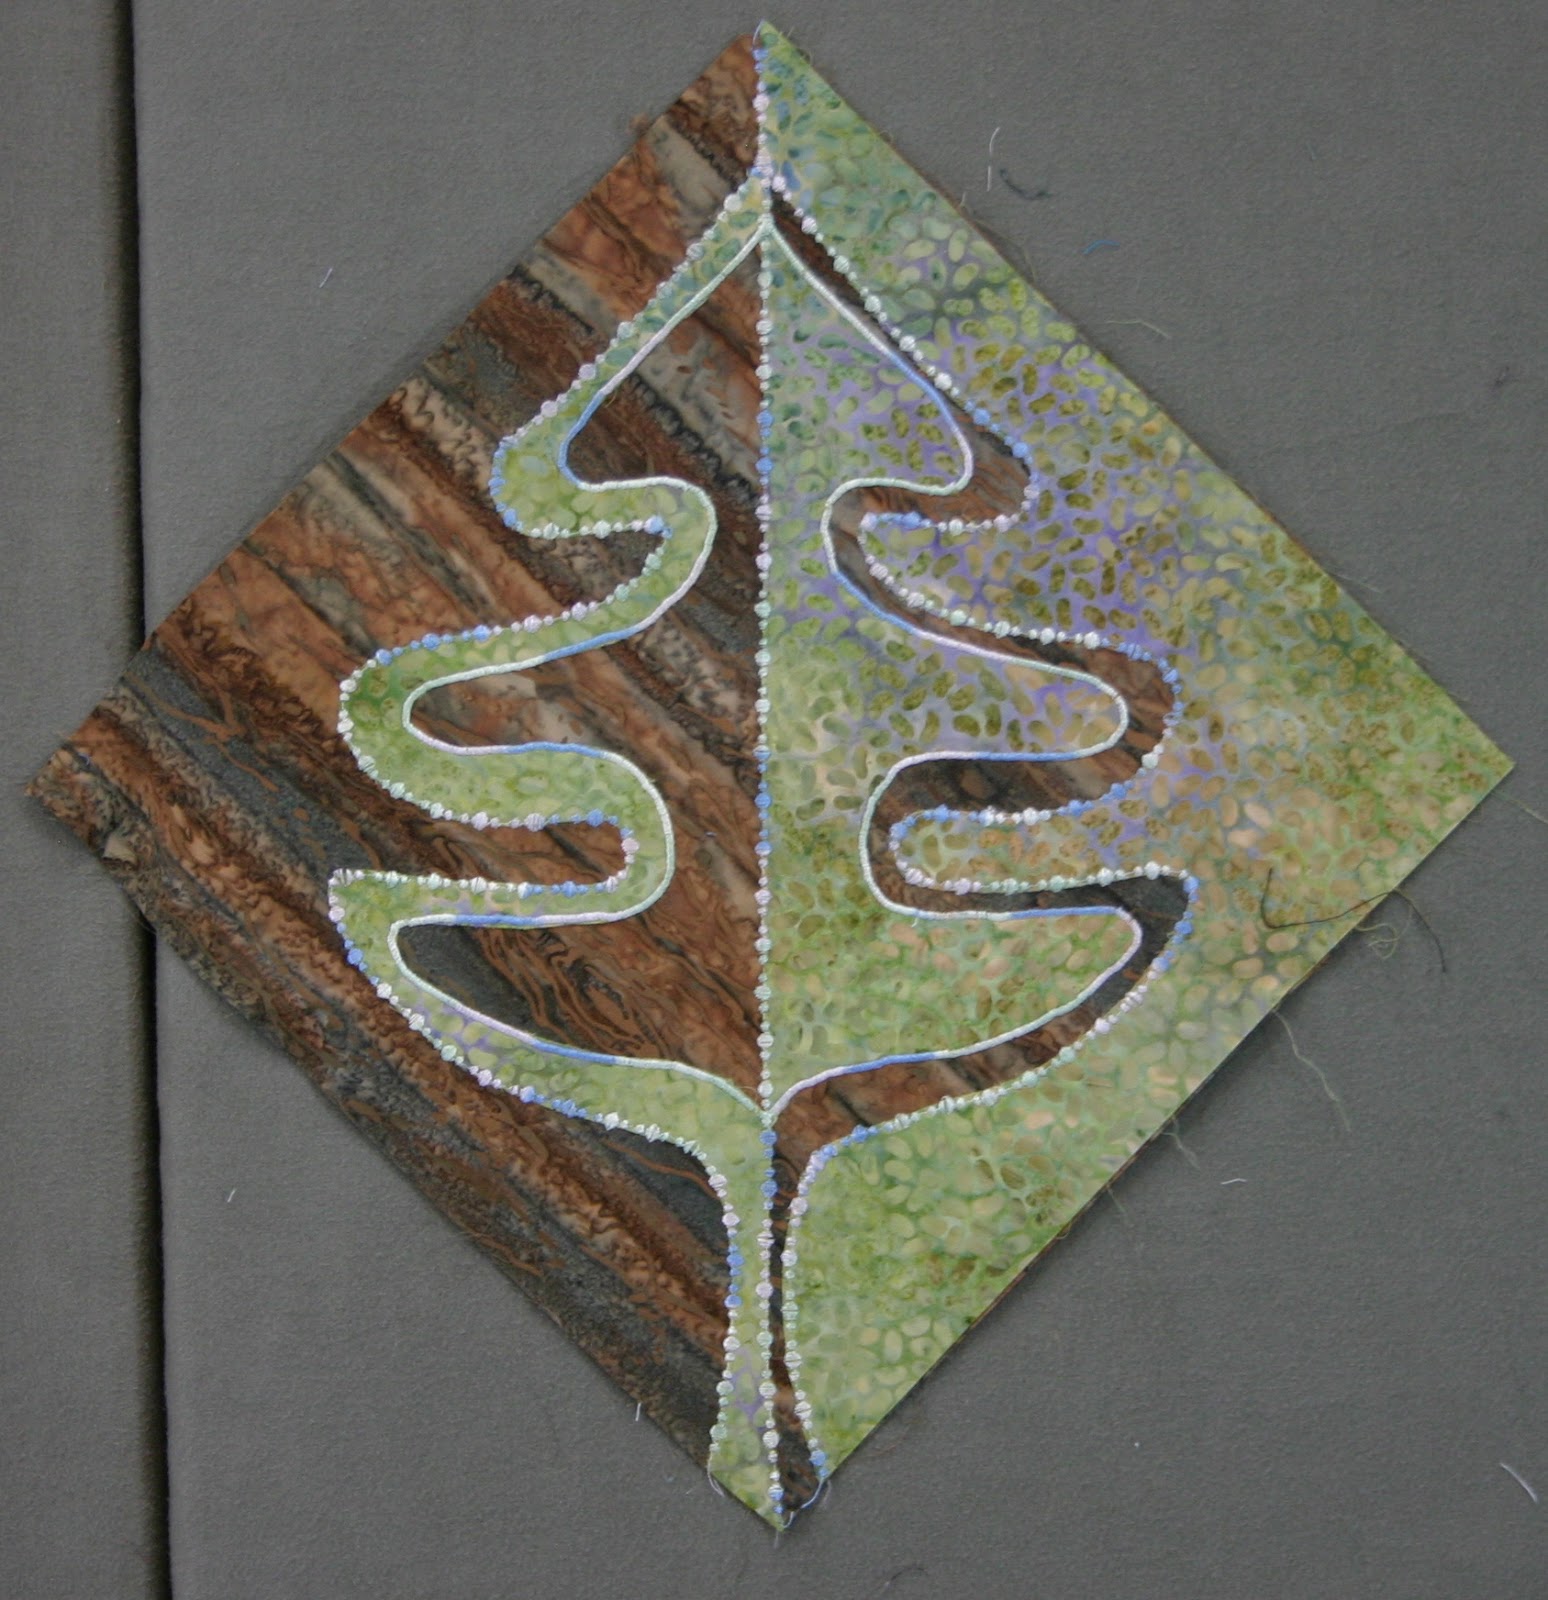
O Tannenbaum V is the fifth in a series of stylized trees.

This is what I started out with this month:
from the UFO pile

I added the four corners using the 2 same batiks that were in the block.

Corners added and top marked for quilting
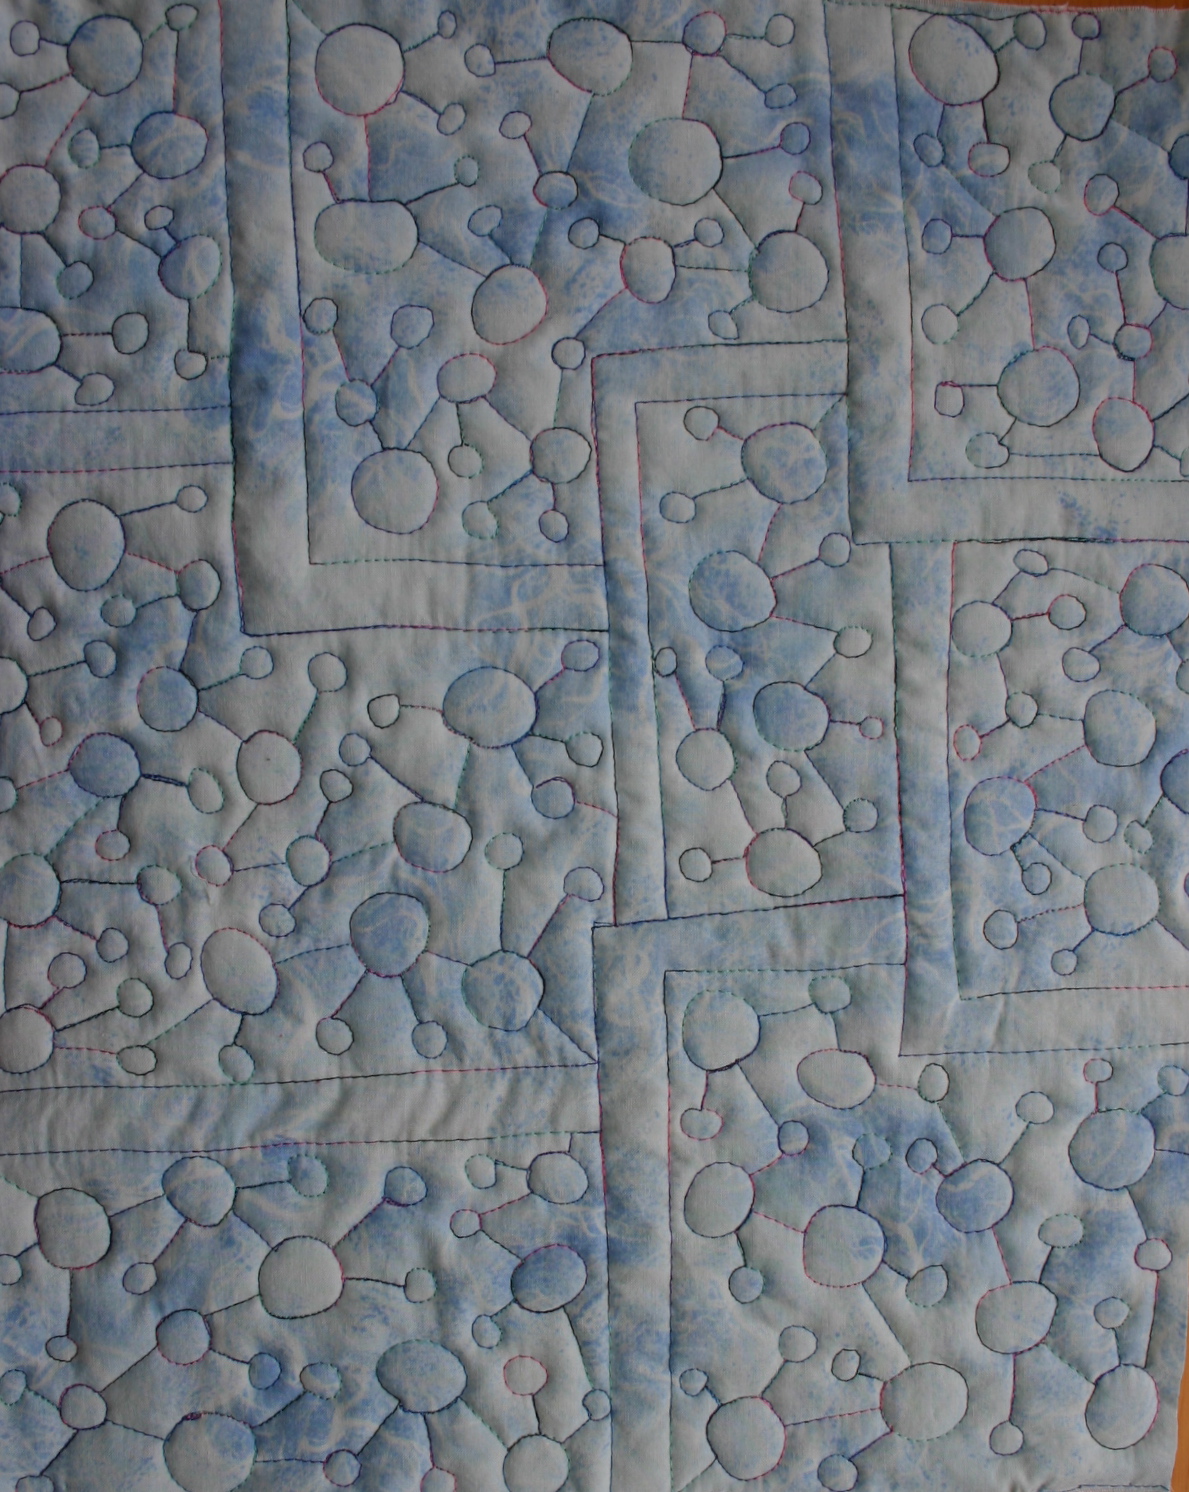
This will be a cushion, so on to the quilting. I used a piece of white cotton for the back which is now on the inside of the cushion. I love quilting feathers so I just had to make some corner designs.

quilting -front

And here's what the back looked like:
quilting - back


I made a matching piping using some of the green fabric, added it around the front piece.


cushion back - zipper - piping

The back is a 100% cotton brown print to which I added an invisible zipper before sewing to the front section.

I signed and dated it at one edge, using one of the alphabet stitches on my machine.
signed and dated

Wishing all a Very Happy 2013!

Terry

DOCUMENTATION

Quilt Name: O Tannenbaum V
Description: cushion of stylized tree
Pattern: original
Size: 18” x 18”
Fabrics: Batiks, 100% cotton
Predominant colours: green, brown
Construction Techniques: Layering of 2 fabrics, stitching and cutting away. Decorative stitches cover raw edges. Technique shared by Maurine Roy in magazine article.
Back: 100% cotton
Batting: bamboo
Edge finish: piping
Quilting: free motion
Quilted by: Terry Whyte
Label: stitched on back
Date completed: December, 2012
Maker: Terry Whyte

Friday, December 21, 2012

It's a Wrap!


 The 2012 Free Motion Quilting Challenge from SewCalGal is complete.

Even though I have been free motion quilting for several years, I have learned so many things from participating in this project.

All the teachers have been so giving and inspirational with easy to follow instructions, which could be gone back to anytime you wanted. The tutorials were so full of information, not only about free motion quilting but everything from fabric, batting, thread as well as design and products that can help make the process easier (or even just how to go about getting it done).

As part of the project, we are asked to do a summary of our year's samples and projects.

This my recap of the year's projects.

So here goes!!

January with Frances Moore

This is a little mini that was in the UFO pile and perfect to practice Frances Moore's leaf design. It is a replica (in miniature) of A Trip Around the World I made back in the '90s for my mother-in-law.

back

Mini Trip Around the World - front


February with Diane Gaudynski

This tutorial was excellent and I finally understood how to make feathers that I was really happy with.  The background filler on my sample was also new to me. 
Plumed Rio Grande was great to practice feathers and another UFO out of the closet.


feather sample

Plumed Rio Grande


March with Ann Fahl

It never occurred to me to combine the Loopy loop and stippling,  Ann calls this Loop and Twist. It was so much fun, it was hard to stop.  I kept adding different designs to stippling and ended up quilting six placemats, each with a design of its own.  The picture below shows the back of 3 of those.

sample
Red Placemats

April with Don Lin

This was another new technique for me.  After doing the sample, I tried the technique onto a little amish quilt that had been around for a long time.

sample
Purple Amish

May with Leah Day

I have followed Leah's blog for a long time and used a lot of her designs.  This was a new one and fun and easy to do.  In keeping with my plan of finishing a UFO using the technique of the month, I picked a lap size Trip Around the World to practice the double stipple. 

sample
Best Friends

June with Cindy Needham

I love Cindy's "Divide and Conquer".  Looking through my UFOs for something to try out this technique I found this  top that I had made many years ago to learn applique.   I decided I could adapt Cindy's technique with a little change . The inspiration for the squares (rather than random shapes) came from Melanie Testa's book “Inspired to Quilt”.
sample
Out on a Limb
July with Angela Walters

Angela taught us how break down large areas with tiles.  My first attempt was the straight square tile and I had a hard time keeping the everything looking square.  I then tried the irregular and jagged variation which I found suited me a lot better.  I have a twin size quilt about 3/4s done with this design.  That will have to go on the list for next year.


August with Wendy Sheppard

Wendy's challenge was Jester's Hats which looked real simple at first glance but took some practise to “try to” master.  Another small UFO - Little Irish - a miniature Irish Chain got covered with Jester's Hats.  
sample
Little Irish
September with Paula Reid

This is my sample but since I did not have any Golden Threads paper I used Glad Press 'n Seal.  It worked well and stuck to the paper for tracing and to the fabric for stitching.  

sample
October with Teri Lucas

This was the first time I ever quilted on silk and I love the looks of it.  On this sample I tried as many different kinds of threads that I thought would work for this project. 

sample
November with Sarah Vedeler

Sarah challenged us with doing spirals in a grid format. I especially like the looks of the small spirals in the grid (mine are 1”). I thought I would give myself an extra challenge and quilt on satiny fabric.
Spiral Cushion

December with Patsy Thompson 

Patsy challenged us with doing borders. My favourites were the feather borders, the tutorial on how to do take offs and kissing corners to get mirror images was excellent.  My sample  is a reversible table topper, measuring 22” x 22”.
Border Sampler - Side 1
Border Sampler - Side 2
Thank you SewCalGal for all your hard work and thanks to all the great teachers who made this possible.  I learned a lot and enjoyed every minute of this challenge.


Terry

Wednesday, December 19, 2012

December, 2012 FMQ Challenge with Patsy Thompson

 Quilt #115 - Border Sampler


Border Sampler - Side One


This is number 12 and the last challenge of the year for the SewCalGal Free Motion Quilting Challenge.

Border Sampler - Side Two
This month, Patsy Thompson challenged us with doing borders. My favourites were the feather borders where we learned a couple of different designs. The tutorial on how to do take offs and kissing corners to get mirror images was excellent.

I found Patsy's video very helpful in getting the feathers to fit in the border spaces

Here are some close-up shots:


My sample this month uses plain white on side one and black on side two, for a little reversible table topper, measuring 22” x 22”.

I decided to try a very bright variegated thread on both sides and do alternate rows in plain rayon, light blue on the white side and yellow on the black.

Work in progress:

Auditioning for binding.  All along I had thought of using a black and white print but did not care for that look so went with a wild colourful print instead.

choosing binding fabric

I think it looks nice on my blanket box.


Thoroughly enjoyed the whole process, thank you Patsy!

Linking up to SewCalGal Free Motion December Quilting Challenge.

Have a look at what other Canadian bloggers are doing at The Needle and Thread Network.

Terry

Saturday, December 15, 2012

Overlap- Squaring Up - VI


 Quilt #114


Overlap is #6 and last (for now) in my series “Squaring Up”.

For this quilt I cut squares from discharged pieces as well as hand-dyed and a few rusted experiments.

All the pieces were backed with fusible web, cut into squares of different sizes and then overlapped and fused to a backing.

detail
The quilt sandwich was stitched with decorative machine stitches in circles using a circle attachment on my Bernina.


I stippled in each circle using the same colour and overlapped the stippling as well. Any areas not covered by circles was quilted with a straighter lined design.

detail
This square inspired my colour choice for my overlapped circles.


And here's the back and label

Overlap - Squaring Up VI - back

label


DOCUMENTATION:
Quilt Name: Overlap– Squaring Up VI
Description: Overlapped squares
Pattern: Original
Size: 19¼” x 30½”
Fabrics: 100% cotton
Predominant colours: Black and rust
Construction Techniques: Discharged fabric, rusted, hand-dyed, fusing, embroidered cirlcles
Back: 100% hand dyed muslin
Batting: warm and natural cotton
Edge finish: double fold french binding
Quilting: Free motion stippling
Quilted by: Terry Whyte
Sleeve: yes
Label: yes
Date completed: 2012
Quilt History: displayed in the 2012 Kirkland Lake Mile of Gold Quilters Guild
Maker: Terry Whyte

Sunday, December 9, 2012

Purple Flower - Squaring Up - V


Quilt #113
Purple Flower

Purple flower was a monoprint that I made by applying purple, white and gold metallic paint to a piece of glass, actually a 12 “ mirror square, swirled with my fingers and printed on black cotton.

After glueing the fabric to Timtex with 505 adhesive, I added mauve wool by couching and quilting with purple and gold metallic thread.

detail 

I squared up the piece to 10” and then cut it up in 2” squares and appliqued each square to a hand dyed using a free motion zigzag stitch.

I sandwiched the top with a similar hand dyed for the back and quilted between the squares and along the edges with a lot of straight lines using a variegated purple thread'

quilting - bindind
A spotty purple print for the binding and sleeve finished off the quilt.

Purple Flower back

label

Purple is my least favourite colour and I find it hard to work with, but I keep trying.

This #5 of “Squaring Up”, a series using squares as my theme.


DOCUMENTATION:
Quilt Name: Purple Flower – Squaring Up V
Description: a grid of squares appliqued to a background
Pattern: Original
Size: 17½” x 19”
Fabrics: 100% cotton
Predominant colours: Purple, gold, black
Construction Techniques: Finger painted monoprint on cotton, couching, free motion quilting applique
Back: 100% hand dyed cotton
Batting: warm and natural cotton
Edge finish: double fold french binding
Quilting: Grid lines quilted on Domestic Machine
Quilted by: Terry Whyte
Sleeve: yes
Label: yes
Date completed: 2011
Quilt History: displayed in the 2012 Kirkland Lake Mile of Gold Quilters Guild
Maker: Terry Whyte

Wednesday, December 5, 2012

Dragonfly - Squaring Up - VI


Quilt #112

Dragonfly is #4 in my Squaring Up series.

Dragonfly - Squaring Up VI

This time I started with a 20” square of 100% silk. At least I am fairly sure it is silk but to tell the truth the only thing I could read on the label was “100%”, the rest of it was japanese. This and several other pieces of fabric were a gift from Japan from a friend of my daughter.

It's all about squares.

The piece had a plain square in the centre surrounded by a large printed border. Unfortunately, I do not have a picture of the original piece.

I started by cutting the square into 4 squares and resewing it together with a 1/4” lime green strip.

detail

I then cut the resulting squares into 4 squares each and putting it back together with the red strips, repeating this process with black and finally white strips. The black and white strips are only 1/8” wide.


I drew a large version of the dragonfly from the white on white fabric and stitched it on the front. For the wings I used some loose threads and organza and a line of gold thread around the edges. Although the body of the dragonfly was painted on with Shiva pearl white, it looks very similar to the organza wings.

Dragonfly - Organza wings and Shiva painted body

The dragonfly fabric was used on the back and the edges were cut with a curved rotary blade and fused to the front.

Binding
And this is what the back looks like.  This picture was taken before the sleeve was added.

Dragonfly - Squaring Up VI - Back

I am linking up to Needle and Thread Network, where you can check out other Canadian Quilting blogs. 

Terry


DOCUMENTATION:

Quilt Name: Dragonfly – Squaring Up IV
Description: appliqued dragonfly on a grid of squares
Pattern: Original
Size: 14¾” x 14¾”
Fabrics: 100 % silk and 100% cotton
Predominant colours: Purple, white, green, red, black
Construction Techniques: A large square cut into squares and sewed back together with strips. Applique
Back: 100% cotton
Batting: warm and natural cotton
Edge finish: back fused to front
Quilting: Grid lines quilted on Domestic Machine
Quilted by: Terry Whyte
Sleeve: yes
Label: yes
Date completed: 2011
Quilt History: displayed in the 2012 Kirkland Lake Mile of Gold Quilters Guild
Maker: Terry Whyte